
How to Photograph Gutter Damage for Insurance Claims
When a storm hits or ice pulls at your gutters, the clock starts. The sooner you document the damage with clear, well-structured photos, the easier it is to file a claim, schedule an inspection, and get an accurate repair number. Good images remove ambiguity, reduce back-and-forth with adjusters, and help contractors quote the right scope the first time—especially in Albany and across Upstate NY, where weather can escalate a small gutter issue into a roof, fascia, or foundation problem in a single season.
This guide walks you through exactly how to take useful gutter damage photos—what to shoot, how to frame each shot, and how to organize everything for a clean submission. You’ll also learn when to call in a professional. If you’d like experienced eyes on your pictures, Oleg of United Gutters has reviewed thousands of homeowner images and knows what insurers and adjusters expect to see.
Why Photographs Matter for Gutter Damage Claims
- Clear proof of the current condition: Sharp, daylight photos preserve the exact state of your gutters immediately after a storm or freeze. They timestamp the condition and prevent disputes about pre-existing issues.
- Supports your claim to insurance adjusters: Adjusters depend on visual evidence. Multiple angles, context, and scale show both cause and effect—like wind-torn sections, ice pull, or debris load leading to detachment.
- Helps you get a fair, fast gutter repair estimate: Photos let contractors scope materials, labor, and access challenges without multiple site visits. Better inputs, better numbers.
- Protects your roof, fascia, and foundation: Strong documentation can move your claim along before secondary damage sets in—like soaked soffits, mold, landscape washout, or basement leaks from misdirected downspouts.
- Reduces the chance of supplemental claims: If you document thoroughly on day one, you’re less likely to discover “missed” damage later that requires re-approval and delays work.
Types of Gutter Damage You Should Document
Cracks and holes
Look for punctures from falling branches, seam splits, and corrosion pinholes. Photograph each defect twice: first as a context shot that includes the gutter run, and then as a close-up with a scale reference (ruler, tape measure, or even a coin).
Rust and corrosion
Steel gutters in Upstate NY can rust fast under salt-laden winter air and standing water. Document the extent of rust (linear feet affected), any flaking or pitting, and nearby seams or hangers. Include a close-up of the worst area.
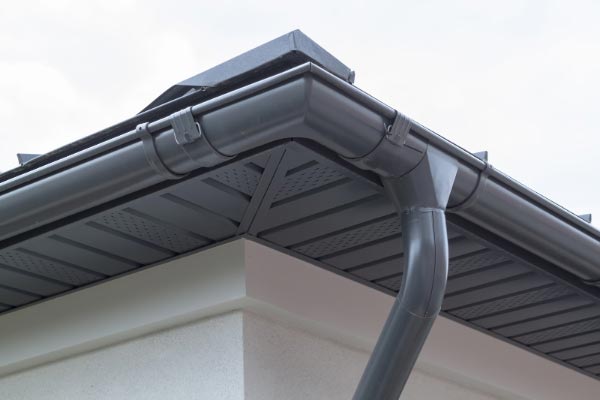
Sagging and separation from roofline
Gutter pulls, failed hangers, or spikes backing out can create gaps. Photograph the gap to show light between the gutter and fascia, the angle of sag relative to the roof, and any missing or bent brackets. An oblique view from ground level helps show the slope.
Overflow signs and water pooling
Overflow marks look like dirt streaks on siding, fascia staining, washed-out mulch, or soil erosion below downspouts. Take wide shots to show the context and close-ups of staining patterns. If it recently rained, capture puddles or splashback on the foundation.
Bonus areas to document
- Downspouts: Dents, disconnects at elbows, crushed ends, or missing fasteners.
- Fascia/soffit: Paint bubbling, wood rot, sagging soffit panels.
- Interior signs: Ceiling stains near exterior walls can connect gutter failures to interior water damage.
Comparison: Visible vs. Hidden Gutter Damage
| Visible Damage | Hidden Damage |
|---|---|
| Cracked seams, holes, bent sections, detached downspouts, missing brackets | Rot behind fascia, soaked insulation near eaves, hidden leaks at miters, ice dam water intrusion |
| Overflow streaks on siding, erosion at landscaping, standing water in gutters | Mold odor in attic, soft fascia boards, paint peeling under eaves, minor ceiling stains |
| Obvious sagging or separation from roofline | Loose fasteners behind old caulk, failing flashing at gutter end-caps |
| Rust patches or flaking metal | Pitting under old paint and sealant; pinhole leaks visible only when wet |
| How to photograph: Wide, mid, and close-up with scale | How to photograph: Show external clues; include interior ceilings and soffits. Note moisture meter readings if you have them. |
How to Take Useful Gutter Damage Photos
Equipment that works
- Use a reliable smartphone or digital camera (12MP or greater is ideal).
- Clean the lens with a microfiber cloth before shooting.
- Turn on “Save location” and “Save date/time” if available. If you prefer not to save location, include a written address shot (see below).
Lighting and timing
- Always photograph in daylight—morning or late afternoon gives softer light with fewer harsh shadows.
- If it just rained or snowed, capture the evidence immediately (standing water, active drips, icicles) but stay safe and shoot from the ground.
Angles and composition
- Take three angles per issue:
- Wide shot: Show the entire gutter run or a large section for context.
- Close-up: Fill the frame with the damage and include a scale reference (ruler/tape/coin).
- Overhead perspective: From a safe window, porch roof, or with a selfie stick/monopod from the ground. Avoid ladders if you’re not trained.
- Include at least one photo with your home’s address visible (house numbers, mailbox, or a note card with the address placed in frame).
- Hold the phone steady with both hands; tap to focus on the damaged area.
- Take duplicates. Blurry happens—backups save time.
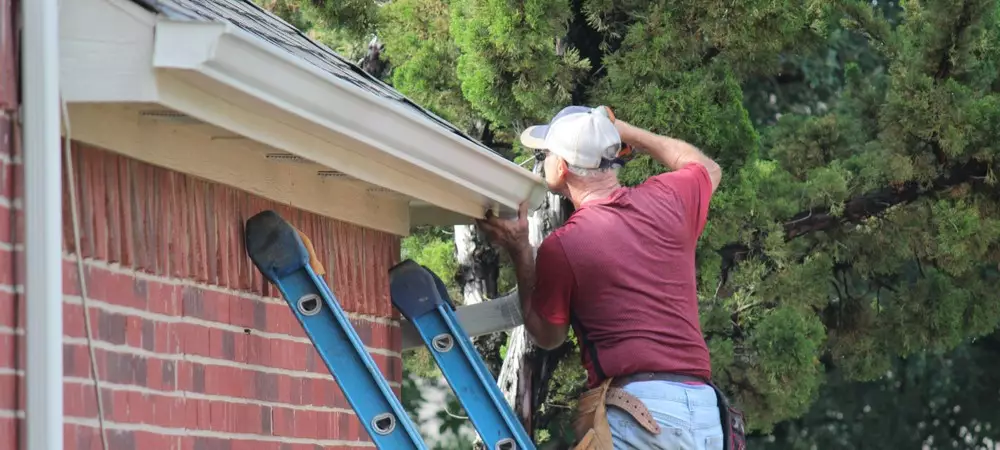
Safety first (especially on two-story homes)
- Do not climb a ladder alone or in high winds/ice. Most claims don’t require rooftop photos from homeowners. Ground-level zoom and window shots are enough.
- Use a stabilizing device if you must elevate (monopod/selfie stick) and keep both feet on the ground.
- If an area is unsafe to reach, note that in your claim and let a pro document it.
Easy photo checklist
- Front elevation: left, center, right (3 photos)
- Back elevation: left, center, right (3 photos)
- Each damaged section: wide, mid, close-up with scale (3 per location)
- Downspout connections and elbows (2 per downspout)
- Fascia/soffit near damage (2–3 photos)
- Ground-level evidence: erosion, puddles, splashback (2–4 photos)
- Interior ceiling/wall stains that relate to gutter lines (1–3 photos)
- One photo showing your address/house number
- One photo of the date written on paper in the frame (backup for metadata)
When to Hire a gutter repair estimate expert
- If multiple sections are affected or a whole run is compromised
- If internal water damage exists (ceiling stains, attic moisture)
- If repairs exceed $500 or involve structural elements (fascia replacement, soffit rebuild)
- If the home is two stories or has complex rooflines, valleys, or dormers
- If ice damming, snow slides, or wind uplift damaged hangers, miters, or end caps
Pro documentation can include measurements, slope checks, hanger spacing, and a safer overhead view. This additional detail can make your claim smoother and your scope of work clearer.
Mistakes That Delay Insurance Claims
- Photos that are blurry or taken in the dark—adjusters can’t verify what they can’t see.
- No reference item for scale (ruler/coin)—hard to judge hole size or gap width.
- Missing time/date info—add a note card with the date or include screenshots showing file timestamps.
- No context shots—close-ups without a wider view obscure location and extent.
- Editing or filtering images—avoid any edits that could be misinterpreted as altering evidence.
- Mixing old and new damage—label photos clearly by date and event.
- Forgetting interior signs—if gutters caused leaks, interior evidence strengthens the claim.
- Sending giant file sizes without organization—use folders and clear names to speed reviews.
Infographic: Gutter Damage Photo DOs and DON’Ts
Gutter Damage Photo DOs
- Photograph in daylight with a clean lens
- Take wide, mid, and close-up angles
- Include a ruler or coin for scale
- Show your address or place a note card in-frame
- Label files by side/location and date
Gutter Damage Photo DON’Ts
- Don’t climb icy ladders or roofs
- Don’t use filters or heavy edits
- Don’t rely on a single photo per issue
- Don’t omit downspouts and fascia from the story
- Don’t send unorganized photo dumps without labels
Common Questions About Gutter Claim Photos (FAQ)
Q: Do I need professional photos?
A: No. Clear, well-lit smartphone photos are typically enough for initial claims and for contractors to assess scope. If access is dangerous or damage is extensive, a professional inspection helps.
Q: Can I submit mobile phone pictures?
A: Yes. Ensure they’re sharp, taken in daylight, with multiple angles and context shots. Keep originals with EXIF data intact when possible.
Q: What if my gutters are on a two-story home?
A: Stay on the ground. Use zoom, shoot from upper-story windows, and capture context. Note any areas you couldn’t reach—professional documentation can cover those safely.
Q: Should I remove debris before shooting?
A: Lightly clearing loose leaves can reveal cracks or bent sections, but never climb a ladder in unsafe conditions. Photograph the debris first to show the cause of overflow, then a second set after safe clearing if you can do so from the ground.
Seasonal Tips for Albany Homeowners
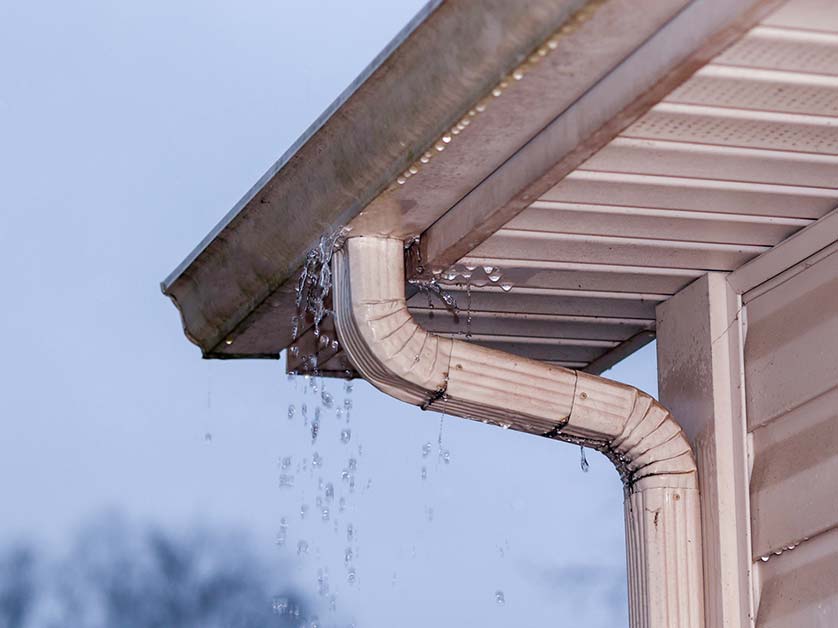
Winter: Ice damage and snow backup
- After freeze-thaw cycles, photograph icicles hanging from gutters, ice sheets inside the troughs, and any pulled-fastener points. Capture soffit vents and fascia for signs of warping.
- Show interior ceiling stains along exterior walls that correlate with ice damming.
Spring: Separation and soil washout
- Take wide photos of gutter runs as snowmelt and spring storms test capacity. Look for gaps between gutter and fascia.
- Document eroded mulch or soil near downspouts; capture the downspout termination to show if it’s too close to the foundation.
Fall: Overflow during leaf season
- When leaves pile up, photograph standing water and overflow streaks on siding. Show gutter guards if installed to verify performance.
- If you’re seeing repeated overflow, read this guide on How to Fix Overflowing Gutters in Upstate NY for seasonal maintenance pointers.
Not sure if what you’re seeing warrants a repair call? Review these Signs You Need a Gutter Repair Contractor and compare them to your photos before you submit.
Why a gutter repair estimate Should Follow Your Photos
Photos establish the story; the estimate sets the plan. Once you’ve documented the problem, a written scope translates image evidence into material counts, hanger spacing corrections, slope adjustments, fascia repairs, and safe access methods. Here’s why the estimate matters after the camera work:
- Aligns with insurer expectations: Estimates tied to photos help adjusters link each line item to visible damage.
- Prevents oversights: A pro will translate exterior symptoms into probable hidden issues (failing miters, end-cap leaks, underperforming outlets).
- Optimizes timing: In Upstate NY, scheduling around weather windows is critical. A firm estimate lets you reserve a slot before the next storm.
- Clarifies repair vs. replacement: Photos plus measurements often reveal when a section replacement is more cost-effective than patching.
What to Do After Taking the Photos
- Label and organize: Create folders by side of home (Front/Back/Left/Right) and room (for interior). Use filenames like “Front-Right_Sagging_Close_2025-03-20.jpg.”
- Write a short incident summary: Date/time of event, what you heard/saw, weather conditions, and immediate steps taken.
- Email them to your insurance company: Include your policy number, address, and claim description. Attach 10–25 of the clearest images; offer a link to the full folder in the cloud.
- Forward them to your contractor: Ask for a written scope and timeline. If you haven’t chosen one yet, request a gutter repair estimate based on your images.
- Keep a backup: Save originals in cloud storage or an external drive. Don’t delete until the claim is fully closed.
- Retain receipts: Tarping, temporary downspout extensions, or emergency cleanup costs may be reimbursable—photograph those, too.
How Oleg Helps Homeowners Make Smarter Claims
- Honest inspections: Straightforward assessments that distinguish storm-related damage from deferred maintenance, so your claim stays credible.
- Reliable photo review and project documentation: Clear markup of your images and a methodical scope of work that ties line items to visible evidence.
- Explains what’s urgent and what isn’t: Stabilize the critical issues first (hangs, leaks near entrances), then plan long-term improvements for durability and drainage.
- Local insight: Albany and Upstate NY conditions—ice load, wind, and leaf cycles—inform hanger spacing, outlet sizing, and guard selection.
If you want a fast read on your photos and a clear path forward, request a detailed gutter repair estimate and include your labeled image folder for review.
Gutter Damage Photo Checklist
| # | Action | Done |
|---|---|---|
| 1 | Take one exterior photo with house numbers or address in-frame | [ ] |
| 2 | Front elevation: left, center, right wide shots | [ ] |
| 3 | Back elevation: left, center, right wide shots | [ ] |
| 4 | Each damaged area: wide + mid + close-up with ruler/coin scale | [ ] |
| 5 | Downspouts: top connection, elbows, termination points | [ ] |
| 6 | Fascia/soffit near damage: staining, rot, gaps | [ ] |
| 7 | Ground evidence: splashback, erosion, puddles by foundation | [ ] |
| 8 | Interior ceilings/walls near exterior lines (if any stains) | [ ] |
| 9 | Photo of written date in-frame (backup to metadata) | [ ] |
| 10 | Name and sort files by side/location; send to Oleg for review | [ ] |
Long-Term Value of Keeping Gutter Records
- Faster claims later: A photo log creates a baseline; if new damage occurs, you can immediately show “before and after.”
- Proof of maintenance: Buyers and insurers appreciate documented cleanings, guard installs, and previous repairs.
- Fewer disputes: Clear records reduce questions about timing, cause, and scope—especially with storm events common in Upstate NY.
- Smarter upgrades: Over time, your photo archive highlights recurring trouble spots, informing better drainage strategies.
Conclusion
Strong gutter photos make insurance claims smoother, estimates more accurate, and repairs faster. Use daylight, take three angles per issue, include scale and address shots, and organize your files with clear names. When in doubt, ask for professional guidance—especially for multi-story homes or suspected interior damage. For experienced support reviewing your photos or building a precise scope, reach out to United Gutters and get your project moving with confidence.
Need help today? Email or call to have your damage photos reviewed and to map out next steps—before the next storm rolls through.