
How Can I DIY Gutters to Save Money and Avoid Damage?
Summary
- Match fixes to local weather: freeze–thaw, snow slide, and fall debris shape every decision.
- Correct slope and secure hangers before chasing leaks with sealant.
- Upsize downspouts or add extensions when corners overflow in Capital Region storms.
- Know the stop points: fascia rot, repeat seam leaks, and long sags usually outpace DIY.
Introduction
We work on gutters across Schenectady and the broader Capital Region year-round. The jobs change with the seasons, but the pattern is steady: small choices on ladders in September can decide whether a February thaw sends water into a basement, or a March snow slide tears a gutter off old fascia. DIY can save money here, but only when it accounts for our climate and older housing stock.
In our work across Schenectady’s neighborhoods—from Mont Pleasant to Woodlawn—we see gutters that look fine from the curb yet hold standing water, leak at corners, or dump runoff right next to the foundation. This guide explains how to plan, budget, and carry out DIY work that survives Upstate New York weather. We also name the limits we’ve learned the hard way: where repeated patching costs more than a targeted replacement.
Why gutter care matters more in Schenectady and the Capital Region
Local weather and building age drive gutter behavior. We see four consistent pressure points:
- Freeze–thaw cycles: Overnight freezes lock water in seams and pinholes; daytime melts force that ice to expand and break sealant bonds.
- Snow load and slides: Metal roofs and even warm shingle roofs shed heavy sheets that can bend hangers, open miters, and twist downspouts.
- Mixed debris: Maples and oaks drop in late October and November; white pines shed year-round. Needles bridge screens and clog outlets.
- Older housing stock: Wavy fascia, short overhangs, and rafter tails that have seen past ice dams make slope correction and fastening tricky.
Local weather patterns and gutter impact
| Season | Typical pattern | Gutter impact | DIY focus |
|---|---|---|---|
| Late fall | Leaf drop + early freezes | Outlets clog; standing water freezes overnight | Full cleanout, outlet checks, seal small leaks above 40°F |
| Mid-winter | Freeze–thaw, snow slide | Hangers bend; seams pop; ice dams form where heat escapes | Observation from ground; avoid hot work unless safe temps |
| Early spring | Rain-on-snow, fast melts | Overflow at corners; downspout undersizing shows | Test flow, correct slope, consider 3×4 downspout upgrade |
| Summer | Downpours | Water overshoots shallow runs or clogged guards | Re-hang sagging runs, add extensions, refine guard choice |
Common DIY gutter misconceptions we see on Schenectady homes
“A cheap sealant fix is as good as a rebuild”
We’ve found quick beads of generic silicone on cold aluminum seams rarely last past one winter. Polyurethane sealant bonds better in our temperature swings, but it still fails if the seam is moving because the hangers are loose or the slope is wrong.
“One product solves everything”
There isn’t a universal hanger or a sealant that fixes bad slope. Foam guards trap pine needles and freeze into sponges. Splash blocks don’t replace extensions when the grade slopes toward the house. Each issue needs a matched fix.
“Ladder and roof safety is just common sense”
Ladders on icy driveways or settled soil near older foundations shift fast. We see bent gutters from ladders set on the trough and injuries from working solo. A standoff, level feet, and a second person reduce risk more than any tool.
“It looks straight, so the slope is fine”
A straight visual line often hides bellies or back-pitch. Water should move about 1/8 to 1/4 inch per 10 feet toward the outlet. In our climate, that small grade keeps meltwater from freezing into blocks.
Budget DIY decisions that actually change outcomes
Safe declogging and debris removal
- Use a gutter scoop or small trowel; pull debris toward you to avoid pushing into outlets.
- Flush outlets from the top with a hose; if backed up, disconnect the bottom elbow and clear from both ends.
- For second stories, a wet/dry vac with a long hose and hooked attachment reduces ladder time.
Re-use vs replace hangers and spikes
- Re-use: Hidden hangers with intact clips and screws that still bite solid wood.
- Replace: Spikes pulling out of soft fascia, bent hangers after a snow slide, or mixed fasteners causing galvanic staining.
- Upgrade path: Hidden hangers with long structural screws into solid wood outperform spikes on older fascia.
Slope correction vs sectional replacement
- Correct slope by loosening hangers, snapping a chalk line to a new pitch, and re-setting hangers no more than 24 inches apart under stress points.
- Replace a section if it’s kinked, stretched at a corner, or oil-canned so badly that water sits after re-hanging.
Sealant choices that hold up here
- Polyurethane sealant: Better for aluminum seams, end caps, and miters; cures slower but survives freeze–thaw.
- Silicone: Only for very small, dry, non-moving pinholes; can peel under snow load flex.
- Application: Clean to bare metal, dry above 40°F, and back up corners with a patch of aluminum tape under the bead if movement is expected.
Rivets and screws for downspouts and elbows
- Use 1/8-inch aluminum rivets on aluminum downspouts; stainless screws for steel components.
- Three fasteners per joint (two perpendicular, one offset) reduce twist from snow slides.
- Avoid mixing bare steel screws with aluminum; we’ve seen corrosion rings start by spring.
When to upsize downspouts for Capital Region storms
- 2×3 downspouts struggle with pine needles and summer downpours.
- We see consistent improvement when upgrading long runs or large roof planes to 3×4, especially at inside corners where two roof planes meet.
- Adapter boots and enlarged outlets are needed; simply swapping the vertical run without opening the outlet won’t help.
Handling seams, end caps, miters, and ferrules
- Seams: Disassemble if you can. Clean, dry, re-seal with polyurethane, and re-rivet.
- End caps: Remove old sealant fully. Slightly crimp for a tight mechanical fit before sealing.
- Miters: Box miters in corners move a lot; support with an extra hanger within 6 inches on each side.
- Ferrules/spikes: If re-using, drive a longer screw through the existing ferrule into solid wood, not just the outer fascia.
DIY budget comparison for common choices
| Task | DIY material cost (typ.) | Tools to own/buy | Time (per 20–30 ft) | Risk if done poorly | Expected lifespan of fix |
|---|---|---|---|---|---|
| Clean & flush + outlet clearing | $10–$30 | Ladder, hose, scoop | 1–2 hrs | Clogs remain, winter ice blocks | 1 season; longer with guard match |
| Re-hang with hidden hangers | $25–$60 | Driver, level, chalk line | 2–3 hrs | Sag/back-pitch persists; leaks recur | 5–10 yrs if wood is sound |
| Seal and re-rivet corner miter | $10–$20 | Rivet gun, snips | 1 hr | Winter pop if not cleaned/dried | 3–7 yrs with support hanger |
| Upsize downspout 2×3 to 3×4 | $35–$80 | Drill, hole saw/outlet punch | 1–2 hrs | Leaks at outlet, splash if slope poor | 10+ yrs; better storm handling |
| Add 10-ft extension (flex or rigid) | $12–$25 | Driver | 30 min | Trip hazard, freeze damage if in path | 5+ yrs; depends on placement |
For more quick, targeted fixes, our write-up on five DIY gutter fixes we see homeowners use successfully gives simple steps and pitfalls to avoid. We also collected fast leak and looseness remedies in these quick fixes for leaks and loose gutters.
Seasonal realities in Upstate NY homes
Ice dams, freeze–thaw, and expansion
Ice dams come from heat loss, not gutters. But backed-up gutters worsen them by holding meltwater at the edge. We see seams open after January thaws; the ice inside expands and shears a thin silicone bead. Stronger sealant helps, but clean runs and correct slope matter more.
Snow-slide impact on gutters and guards
When snow sheets slide, they push against the top edge of the gutter and any guard. Braced hidden hangers hold better than spikes. Solid covers often bend and trap ice at the leading edge. Micro-mesh on a reinforced frame fares better, but only with enough pitch and support.
Leaf fall timing and pine needle accumulation
Maples and oaks peak late, often after the first hard freeze. Flushing right before that window reduces trapped water. Pine needles filter through wide screens and form mats at outlets; we see fewer winter clogs with finer mesh or with no guard and a strict fall cleaning.
DIY gutter protection: what helps and what hurts here
- Screens: Cheap and fast, but pine needles bridge the openings and freeze in place. Works acceptably on low-needle lots with routine blow-offs.
- Micro-mesh: Better at filtering needles; needs sturdy frames and frequent outlet checks. In heavy snow areas, add more hangers to support the extra weight.
- Foam inserts: We consistently see these hold water, freeze, and grow moss. They compress under snow and collapse outlets by spring.
- Heat cables: Useful on short, known dam zones when insulation/venting fixes are delayed. They are a patch, not a cure, and raise electric costs.
Curb and drainage outcomes that prevent winter and spring problems
- Splash blocks vs extensions: Splash blocks help only when the grade already sheds water away. In winter, they ice up near walkways. A 6–10 foot extension moves water beyond frost-heaved soils and salt paths.
- Directing water away from foundations: We see fewer spring seepage calls when extensions discharge on the downhill side and onto a stable surface (stone bed or lawn with positive slope).
- Walkway safety: Avoid directing outlets across frequently used paths; freezing spray in February causes falls.
When DIY costs stop making sense
- Repeated leaks at seams and corners after proper prep and polyurethane: Movement or warped sections likely; replace the miter or the run.
- Fascia rot and hidden damage: If screws spin, the wood behind is soft. Patching over it won’t last through a snow load.
- Sagging runs beyond spot fixes: If more than a third of a run bellies, re-hanging every few feet becomes a rebuild in slow motion.
- Overshooting water during heavy Capital Region rains: Shallow runs, tiny outlets, and long roof planes often need a profile change, a second outlet, or upsized downspouts.
How to evaluate cost vs return in Schenectady
- Materials vs tools: A rivet gun, long level, outlet punch, and quality sealant cost more up front but prevent doing the job twice after winter.
- Time and safety tradeoffs: Two-story corners with ice staining and old paint build risk fast. We see more damage from rushed winter climbs than from delayed spring work.
- Longevity in local climate: A proper re-hang with added hangers near corners outlasts any bead of sealant. Spending on hangers and slope usually beats new caps and miters.
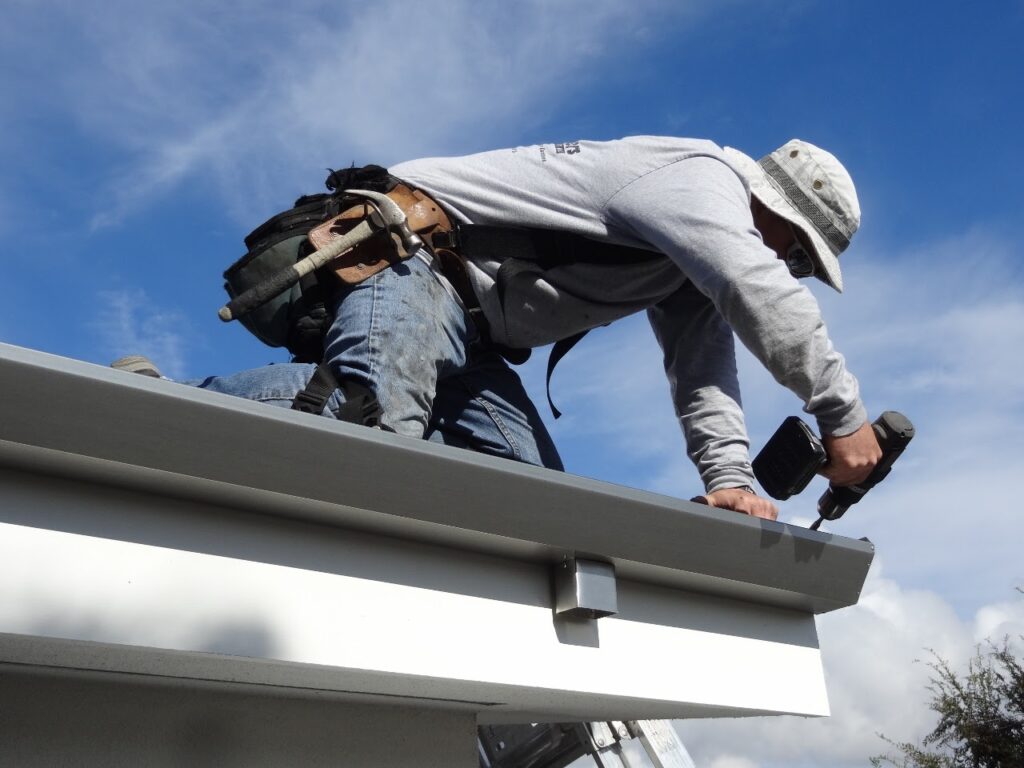
Step-by-step DIY gutter checklist for Schenectady homeowners
- Plan your window: Choose a dry day above 40°F if sealing; avoid windy winter days for ladder work.
- Safety setup: Level ladder feet, add a standoff, and have a second person. Don’t set ladders on frozen mulch or sloped pavers.
- Inspection pass from ground: Note overflow stains, bent sections, and splash patterns at the ground.
- Clean debris: Scoop from downspout back toward the high end. Bag debris; don’t wash it into outlets.
- Clear outlets: Disconnect the lower elbow if needed. Flush from top to bottom and back up.
- Check slope: Place a level inside the gutter. Mark a new line at 1/8–1/4 inch fall per 10 feet toward the outlet.
- Re-hang: Add or move hidden hangers to the new line, 24 inches apart near corners and under expected snow slide zones.
- Seal and fasten: Clean and dry seams, end caps, and miters. Re-rivet and apply polyurethane sealant inside joints.
- Downspout tuning: Replace crushed elbows, add three fasteners per joint, and consider 3×4 upgrades on long roof planes.
- Ground discharge: Add 6–10 foot extensions, direct away from walks and toward positive grade.
- Test: Hose test for 10–15 minutes per run. Check for drips at joints and pooling along the trough.
- Document: Note any wood softness, recurring leaks, or sections that still hold water. These become your replacement targets.
Scenario breakdown: choosing fixes that fit the problem
1) Leak at a corner miter
- Likely cause: Movement from snow load or back-pitch holding water.
- Fix path: Re-hang to correct slope, remove old sealant, re-rivet, apply polyurethane, add hangers within 6 inches of the miter.
- Stop point: Miter visibly warped or split; replace the miter.
2) Sagging mid-run
- Likely cause: Hangers too far apart or spikes pulling from soft fascia.
- Fix path: Add hidden hangers every 24 inches, drive structural screws into solid wood, snap a new pitch line.
- Stop point: Fascia rot or more than one-third of the run bellied; address wood or replace the run.
3) Overflow at inside corner during downpours
- Likely cause: Outlet too small, debris at the miter, or two roof planes feeding one 2×3 downspout.
- Fix path: Clean, open a larger outlet, upgrade to a 3×4 downspout, and confirm slope into the corner.
- Stop point: Water overshoots even after upgrade; consider a second outlet or diverter upstream.
How DIY gutter work affects the rest of the home
- Water management around foundations: Proper extensions reduce hydrostatic pressure and spring seepage we frequently see on older basements.
- Roof and fascia lifespan: Tight hangers and correct slope prevent backflow under shingles and reduce freeze expansion against fascia.
- Winter ice formation and safety: Clear outlets and right-sized downspouts limit icicles at entries, which is a routine winter complaint we hear.
- Maintenance intervals and total yearly cost: Two shorter cleanings (late fall and early spring) usually cost less than repairing winter seam failures.
FAQs
Is DIY worth it for gutter repair in Schenectady New York homes with two stories?
Sometimes. If access is clear, wood is solid, and you have safe ladder support, re-hanging and sealing can pay off. If fascia is soft or access is over steep grade, the risk often outweighs savings.
What about searching for “gutter repair near me” when I get stuck?
That search helps you find local providers familiar with Capital Region weather. The key is asking how they’ll handle slope, hanger spacing, and downspout sizing for your roof planes rather than focusing only on sealant.
Will micro-mesh guards stop pine needles in our area?
They reduce needle entry, but outlets still need checks. We see the best results when mesh sits on a stiff frame with added hangers at corners, plus seasonal hose tests.
Do mixed metals cause problems?
Yes. Bare steel screws in aluminum downspouts create corrosion spots. Use aluminum or stainless fasteners that match the material.
Does DIY affect roof or product warranties?
Some shingle warranties mention improper water management but rarely cite gutters directly. The real issue is damage from leaks or ice. Keep records and photos of your work and materials.
Are heat cables a good solution for ice dams?
They help specific trouble spots but don’t fix insulation or ventilation issues. We use them as a controlled patch while upstream heat loss is addressed.
Conclusion
In our experience, DIY gutter work in Schenectady pays when it puts structure ahead of sealant. Clean outlets, correct slope, tight hangers, and the right downspout size carry a system through snow, thaws, and summer storms. Patchwork that ignores movement, soft wood, or undersized outlets rarely lives past a winter here. Know where a measured fix ends and a replacement starts, and match every decision to what our weather will do to it by February.
If you’d rather have a set of eyes on your setup before making the call, our gutter installation in Albany, NY page is a straightforward starting point.