
DIY Gutter Repair: 5 Quick Fixes for Leaks and Loose Gutters (and the average cost of gutter repair)
If you live in Albany or anywhere in Upstate New York, your gutters take a beating—spring downpours, summer storms, fall leaf drop, and winter ice. The good news: many small gutter problems can be handled in an afternoon with basic tools. This guide walks you through five quick, budget-friendly DIY fixes for leaky seams, loose hangers, bad slopes, end-cap drips, and clogged downspouts—so you can protect your home without overspending.
For bigger issues or recurring leaks, scheduling gutter repair near me ensures the job is done safely and correctly the first time—protecting your Albany home from costly water damage and keeping your system working efficiently year-round.
We’ll also help you think like a pro: how to diagnose the issue, what to fix first, and when it’s smarter to call a specialist. If you’re price-conscious (who isn’t?), understanding the average cost of gutter repair will help you decide whether to DIY now or schedule a professional visit later. And if you decide you want a seasoned local expert, Oleg of United Gutters has earned a reputation for honest, efficient service throughout Albany and the Capital Region.
Why Minor Gutter Damage Matters: Preventing Bigger Issues
Little gutter problems rarely stay little. A small drip at a seam can soak fascia boards and the soffit, inviting wood rot and carpenter ants. A loose hanger can transform a straight run into a sagging trough that overflows and dumps water next to your foundation. In Upstate NY, water mismanaged in the fall and early winter can become ice dams by January, which lift shingles, force meltwater under the roof, and create indoor leaks and attic mold. Even a subtle pitch problem—like a section that’s off-level by a quarter inch—can reduce flow enough to cause backups during heavy summer rain.
Proactive, inexpensive fixes reduce the risk of costly structural repairs. Catching issues now could save you thousands on siding replacement, basement waterproofing, or roof repairs down the line. And because so many minor gutter problems are straightforward, homeowners with a ladder, some sealant, and a Saturday afternoon can make meaningful improvements fast.
Tools You’ll Need for DIY Gutter Repairs
You don’t need a contractor’s van to do these jobs—just a few essentials. Keep your work area safe and your tools organized, and you’ll move quickly from one fix to the next.
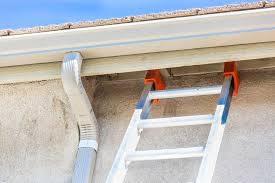
- Sturdy extension ladder with stabilizer (ladder horns/stand-offs to protect gutters and improve balance)
- Heavy-duty work gloves and safety glasses
- Exterior-grade gutter sealant (butyl rubber or polyurethane is ideal for longevity)
- Gutter hangers/hooks and corrosion-resistant screws (hex-head or Torx)
- Cordless drill/driver with nut driver bit; extra bits and screws
- Rivet gun and aluminum rivets (for some sectional/aluminum gutter junctions)
- Putty knife and wire brush (for cleaning seams before sealing)
- Caulk gun for sealant tubes
- Level (2–4 feet) and a chalk line or string line (for slope checks)
- Hose with spray nozzle and/or plumber’s snake for downspouts
- Bucket, contractor bags, and a small scoop for debris
Optional but handy: tin snips (for trimming straps), touch-up paint for exposed screw heads, and spray lubricant for stubborn fasteners.
The Top 5 DIY Gutter Fixes
1) Sealing Small Gutter Leaks
Small leaks often occur at seams, miters (corners), and around end caps. These leaks can look harmless but can soak fascia boards and siding over time. Fortunately, sealing is one of the fastest fixes.
Steps:
- Clean and dry the area. Remove debris with a putty knife and wire brush. If the gutter is wet, towel it dry and allow a few minutes for residual moisture to evaporate. Sealant adheres best to clean, dry metal.
- Apply exterior-grade gutter sealant. Run a continuous bead along the seam or pinhole area. For corner miters, work the sealant into the joint from both sides if possible.
- Tool the bead. Use a gloved finger or a plastic spreader to press sealant into gaps and smooth it for a watertight seal.
- Let it cure. Most gutter sealants skin over in 15–30 minutes and fully cure in 24 hours. Avoid testing with heavy water until it’s set.
Pro tip: If a seam repeatedly leaks, the joint may be failing mechanically. Drill out old rivets and re-rivet, or consider a short splice repair section before sealing.
2) Reattaching Loose Gutter Hangers
Loose hangers cause sagging and standing water. In Upstate NY, snow loads magnify the problem, and a sag can turn into a separated section by spring. Tightening or replacing hangers is a high-impact, low-cost fix.
Steps:
- Identify the sag. Sight down the gutter run. Mark low spots with chalk. Hangers should be spaced roughly every 24–36 inches—closer if the run faces heavy snow or long spans.
- Tighten or replace. If a screw has stripped in the fascia, move the hanger slightly and fasten into solid wood. Use 1.5–2.5 inch corrosion-resistant screws. Consider fascia brackets or hidden hangers with built-in screws for stronger hold.
- Add extra hangers at stress points. Corners, end caps, and downspout outlets are frequent stress spots. Reinforce them.
- Re-check alignment. After fastening, run a hose test to ensure proper flow to the downspout.
Pro tip: If fascia wood is rotted, no screw will hold. Temporarily reinforce another section, then plan to replace the fascia board before reinstalling hangers.
3) Correcting Minor Gutter Slope Issues
Gutters should slope toward downspouts at about 1/4 inch per 10 feet. Over time, hangers loosen and sections flatten or back-pitch. Even a small pitch error can create standing water that breeds mosquitoes, corrodes metal, and freezes into heavy ice.
Steps:
- Measure the run. Use a string line or chalk line from one end to the downspout outlet. Mark a target drop of 1/4 inch for every 10 feet of gutter length.
- Loosen and reposition hangers. Starting at the high end, slightly loosen hanger screws, then raise or lower the gutter to follow your guide line. Tighten each hanger as you go.
- Check with a level. Place a 2–4 foot level in the gutter channel. A very slight bubble bias toward the downspout is what you want.
- Test with a hose. Water should move steadily and completely toward the outlet, with no standing pools.
Pro tip: If a long run needs more pitch than the fascia angle allows, you may need to split the run and add a second downspout, or raise the high end slightly using spacer blocks.
4) Fixing End Cap Leaks
End caps are frequent drip points. Expansion and contraction through freeze-thaw cycles in Albany winters can work sealant loose, and caps can shift if hangers are too far apart at the ends.
Steps:
- Remove old sealant. Gently pry away loose material and wire-brush the cap and gutter edge. Clean off dirt and oxidation.
- Reseat or re-crimp. If the cap feels loose, gently tap it snug with a rubber mallet. On some systems, you may need to re-rivet the cap.
- Seal thoroughly. Apply a continuous bead of gutter sealant around the inside seam of the cap. Tool the bead, then add a thin exterior bead if needed for insurance.
- Reinforce with a nearby hanger. Adding a hanger within 6–8 inches of an end cap can reduce movement and future leaks.
Pro tip: Avoid using silicone on metal gutters—it can lose adhesion in cold and UV. Butyl rubber or polyurethane sealants tend to perform better through Upstate NY seasons.
5) Unclogging Downspouts and Improving Flow
A clean gutter still overflows if the downspout is clogged. Leaves, twigs, asphalt shingle granules, and even kids’ balls can choke the elbow near the outlet. Clearing this is often the difference between a system that works and one that overflows every storm.
Steps:
- Start at the top. Scoop debris from the gutter near the outlet. Flush with a hose to see if water drains.
- Clear the elbow. If water backs up, remove the downspout elbow screws and pull the elbow off. Use a gloved hand, a small hook, or a plumber’s snake to remove clogs. Rinse thoroughly.
- Check the vertical run. If the clog is further down, disconnect the downspout from wall straps and lay it on the ground to flush from the bottom up.
- Reassemble and test. Reattach with corrosion-resistant screws. Confirm strong flow and no leaks at joints.
Pro tip: Add a downspout strainer at the outlet, or consider a small outlet expansion to reduce clog risk. Ensure downspouts discharge at least 4–6 feet from the foundation with a splash block or extension.
When DIY Doesn’t Cut It: Signs You Need a Pro
DIY is ideal for small leaks, simple hanger adjustments, and clearing clogs. But bring in a professional when you see any of the following:
- Widespread sagging or sections pulling away from the house
- Rotten fascia or soffit, or evidence of mold inside the attic
- Seams that repeatedly fail, or sections leaking behind the gutter
- Ice dam damage, lifted shingles, or water staining at interior ceilings
- Gutters that are dented, crushed, or improperly sized for your roofline
For a deeper checklist, review these 9 warning signs you need gutter repair near me. If multiple red flags show up, labor and parts may exceed a quick DIY; at that point, balancing time and budget against the average cost of gutter repair helps you make a smart call.
Seasonal Gutter Inspections: Why It Matters in NY
Our region’s weather is unique: fall foliage clogs systems, lake-effect and Nor’easter snow loads stress hangers, and freeze-thaw cycles challenge every seam. That’s why a seasonal inspection plan is key. In spring, look for winter damage and ice-dam evidence. In late fall, clear leaves and check slopes before the first hard freeze. And after any major wind or rain event, do a quick visual check for overflows and loose sections.
Not sure how to evaluate everything? Use this practical guide to inspecting gutters in Latham, NY with a trusted gutter contractor. Even if you’re comfortable on a ladder, having a pro inspection every year or two can reveal hidden issues—like subtle pitch errors or failing fasteners—that aren’t obvious from the ground.
Understanding the average cost of gutter repair before attempting fixes
Costs vary by material, access, and extent of damage, but knowing ballpark figures helps you budget and prioritize. Simple DIY-friendly tasks—resealing a seam, replacing a hanger, or clearing a clog—usually cost a fraction of professional repairs and can save you from future issues if done correctly. More complex work—like rehanging long runs, repairing rotted fascia, re-pitching multiple sections, or adding new downspouts—can push total costs higher because they require more time, materials, and expertise.
Use costs as a decision tool:
- If a fix is quick, safe, and uses inexpensive materials, DIY likely wins—especially if you’re comfortable on a ladder and have basic tools.
- If multiple issues exist (sagging, leaks, and rot together), call a pro. Bundling repairs may be more efficient and can prevent repeated trips up and down the ladder.
- Factor in timing. In fall, fix anything flow-related before freeze season; in spring, address hanger strength and slope to prep for summer storms.
If you’re building a seasonal home maintenance budget, a realistic look at the average cost of gutter repair will help you set aside funds for both DIY supplies and potential pro visits.
Budget-Friendly Gutter Maintenance Tips for Homeowners
Prevention is the cheapest repair. Use these low-cost habits to keep your system performing through Albany’s seasons.
- Clean twice yearly—late spring and late fall. If you’re near heavy tree cover, add a mid-fall clean after peak leaf drop.
- Flush downspouts with a hose every cleaning. A quick flush clears granules and prevents elbow clogs.
- Add hangers where spacing is wide or under stress points. Every 24–36 inches is typical; closer near corners and downspouts.
- Seal suspect seams proactively. If a seam looks cracked or brittle, clean and reseal before it fails mid-storm.
- Direct water away from the foundation. Use splash blocks or extensions to push discharge 4–6 feet away.
- Trim branches that overhang the roof. Less debris means fewer clogs and less weight after storms.
- Consider screens or guards if you clean constantly. Even basic, low-cost screens can dramatically reduce leaf buildup.
- Keep fasteners corrosion-resistant. A small box of exterior screws is cheap and prevents future headaches.
- Document your work. Photos and notes help track problem areas and plan improvements.
Remember: your time has value. If a repair requires specialized tools you don’t have or extends beyond a comfortable afternoon, compare your DIY time against the average cost of gutter repair to decide whether calling a pro is the smarter investment.
Quick Reference: Troubleshooting Common Symptoms
Use this mini cheat-sheet to pair symptoms with fast actions:
- Drip at a corner miter: Clean, dry, reseal inside seam; reinforce with nearby hanger if the corner flexes.
- Overflow at mid-run: Check for clogs downstream; verify slope with a level; add hangers if sag is visible.
- Water behind the gutter: Look for shingles tucked inside the gutter, rotted fascia, or a missing drip edge; reseat and seal as needed.
- Persistent puddling: Re-pitch the section toward the downspout; if pitch is correct, consider outlet expansion or an additional downspout.
- Frequent clogs at the outlet: Install a strainer, trim nearby branches, and clear granules after major storms.
Safety First: Smart Ladder and Weather Practices
In our region, safety is often weather-related. Avoid repairs during high wind, icy conditions, or immediate post-storm slickness. Use a ladder stabilizer to avoid denting gutters and to gain side-to-side stability. Keep three points of contact on the ladder, don’t overreach, and move the ladder frequently. When in doubt, wait for a dry, mild day with steady footing around the foundation.
Putting It All Together: A Sample Weekend Repair Plan
If you’re tackling a typical Albany-area home with a couple of problem spots, here’s a realistic weekend workflow:
- Walk the perimeter. Note obvious sags, seam drips, and downspout slowdowns. Mark them with painter’s tape.
- Clean the dirtiest run first. Scoop debris, bag it, and flush to check downspout flow.
- Clear the worst clog. Remove elbow, snake the downspout, flush, and reassemble.
- Seal the worst leak. Clean, dry, and seal seams and the nearest end cap. Set a timer for cure time.
- Reattach loose hangers. Add extras near corners and downspouts; verify spacing.
- Check slope on the longest run. Re-pitch if needed using a string line, then test with a hose.
- Final hose test all sections. Confirm steady flow and no drips.
By Sunday afternoon, you’ll have improved flow, strengthened connections, and sealed the most vulnerable joints—exactly what your home needs before the next storm cycle.
FAQ: Albany and Upstate NY Homeowners Ask
How often should I reseal gutter seams?
In our freeze-thaw climate, inspect seams annually and reseal as needed. Quality sealant can last several years, but sun exposure and ice load can shorten that timeline.
Are gutter guards worth it here?
Yes, especially under heavy tree cover. Even basic screens reduce clogging and make seasonal cleaning faster. They’re not maintenance-free, but they keep larger debris out of the channel.
Will aluminum gutters survive snow and ice?
Yes, when properly supported. Close hanger spacing, strong fasteners, and correct slope matter more than material alone. If your home regularly sees heavy roof avalanches, consider snow guards on the roof above.
What if my fascia is soft or rotted?
Stop and repair fascia before reattaching gutters. Fastening into compromised wood leads to repeat failures and can make leaks worse.
Conclusion: Fix the Small Stuff Now, Call a Trusted Pro When Needed
With the right sealant, a handful of hangers, and a hose, you can solve the most common gutter problems: leaky seams, loose supports, minor pitch errors, end-cap drips, and clogged downspouts. These simple fixes protect your roofline, siding, and foundation—and they pay off every time it rains or snows. When you see larger issues like rotted fascia, repeated seam failures, or system-wide sagging, it’s time to bring in a specialist. For dependable, local service and straight answers in Albany and the Capital Region, reach out to Oleg of United Gutters. He’ll confirm what’s DIY-friendly, what needs professional attention, and help you protect your home for the long term.